A well-designed garden bed transforms a plain yard into a property with real character. Whether you want a foundation planting along the front of your house, a colorful perennial border beside the driveway, or a practical herb garden near the back door, the process starts with the same fundamentals: choosing the right location, preparing the soil correctly, selecting plants that actually thrive in Anne Arundel County, and finishing with proper mulch and edging. Get those four things right and your new bed will reward you with years of low-maintenance beauty.
After installing hundreds of garden beds across Annapolis, Severna Park, Arnold, Cape St. Claire, and the surrounding communities over the past 20 years, Kevin Schofield and the Schofield Outdoors team have learned what works in our local conditions and what does not. This guide walks you through each step of planning a garden bed installation so you know exactly what to expect, whether you tackle it yourself or bring in a professional crew.
Why May Is the Best Month to Install Garden Beds in Maryland
Timing matters more than most homeowners realize. In the Annapolis area, May hits a sweet spot for garden bed installation that no other month can match.
By early May, the average last frost date (around April 15 in Anne Arundel County) is safely behind us. Soil temperatures have climbed above 60 degrees Fahrenheit, which means warm-season perennials, annuals, and transplants can establish root systems without the risk of a late cold snap killing tender growth. At the same time, the ground still holds moisture from spring rains, so new plantings do not need constant watering the way they would during a July installation.
May also gives your plants the entire growing season ahead to settle in before the stress of Maryland's summer heat arrives in late June and July. Plants installed in May develop stronger root systems and are far more likely to survive their first winter compared to those planted in late summer or early fall.
If your property still needs spring cleanup work -- clearing debris, cutting back dead perennials, edging existing beds -- tackle that first. A clean starting point makes the garden bed installation process much more efficient and lets you see the full layout of your yard before committing to a design.
Choosing the Right Location for Your Garden Bed
The single most common mistake we see in garden bed installations around Annapolis is putting the bed in a spot that fights the natural conditions of the property. Choosing the right location up front prevents years of struggling plants, excessive watering, and frustrating replacements.
Assess Your Sunlight Patterns
Spend a day observing how sunlight moves across your yard. Most flowering perennials and ornamental grasses need at least six hours of direct sunlight (full sun). Foundation beds on the north side of a house typically get less than four hours and qualify as shade, which limits you to hostas, ferns, hellebores, and shade-tolerant shrubs like azaleas and inkberry holly.
Properties near the Chesapeake Bay in Cape St. Claire and Arnold often benefit from reflected light off the water, which can boost the effective sunlight in waterfront beds by an hour or more compared to inland properties in Millersville or Crownsville.
Check Drainage and Soil Conditions
Anne Arundel County soil is predominantly clay-based, which means it holds water longer than sandy or loam soils. Dig a test hole about 12 inches deep, fill it with water, and see how long it takes to drain. If water sits for more than 24 hours, that spot has poor drainage and you will need to either amend the soil heavily, raise the bed, or choose plants that tolerate wet feet like winterberry holly, Joe-Pye weed, or river birch.
Low-lying areas near downspouts, driveways, and swales are common problem spots. If drainage is a recurring issue on your property, consider a rain garden approach -- a shallow depression planted with native species that absorbs and filters stormwater runoff. This is particularly valuable for properties in the Chesapeake Bay watershed, where reducing stormwater runoff is both an environmental priority and sometimes a county requirement.
Plan for Mature Plant Size
One of the most expensive mistakes homeowners make is planting too close together or placing shrubs too near the foundation. A small boxwood from the nursery grows to four or five feet wide. An oakleaf hydrangea can reach eight feet in every direction. Before you plant anything, research the mature width and height of every species in your plan and give each one enough room to fill out naturally without crowding. Overcrowded beds require constant pruning, look messy within two years, and promote fungal disease from poor air circulation -- a real problem in Maryland's humid summers.
Soil Preparation: The Foundation of a Healthy Bed
Good soil preparation separates garden beds that thrive from those that struggle. Skip this step and even the best plant selection will underperform.
Test Your Soil First
The University of Maryland Extension offers affordable soil testing for Anne Arundel County residents. A basic test costs around $20 and tells you your soil pH, nutrient levels, and organic matter content. Most ornamental plants perform best in a pH range of 6.0 to 6.8. Our local clay soils often test slightly acidic (around 5.5 to 6.0), which is fine for azaleas and blueberries but may need lime amendments for other plantings.
Amend the Clay
Pure clay soil compacts easily, drains poorly, and makes it difficult for roots to spread. The fix is incorporating organic matter -- compost, aged bark fines, or leaf mold -- into the top 12 inches of soil. We typically mix in two to three inches of quality compost across the entire bed area, tilling it into the existing clay. This improves drainage, adds nutrients, and creates a loose, workable growing medium that roots can penetrate easily.
Avoid the temptation to simply fill a bed with bagged topsoil on top of untouched clay. This creates a bathtub effect where water pools at the clay layer below the new soil, drowning roots from the bottom up. Blending amendments into the existing soil creates a gradual transition that allows proper water movement through the entire root zone.
Grade the Bed Properly
Every garden bed should slope gently away from your home's foundation -- about one inch of drop for every four feet of distance. This prevents water from pooling against the house, which can cause foundation damage, basement moisture problems, and ideal conditions for termites. Proper grading is something our crew checks on every landscape design project because it affects the long-term health of both the plantings and the structure.
Selecting Plants That Thrive in Anne Arundel County
The right plant selection makes the difference between a garden bed that practically takes care of itself and one that demands constant attention. Here are the categories we recommend for most Annapolis-area garden bed installations.
Foundation Plantings
Foundation beds frame the front of your home and create curb appeal. For Anne Arundel County properties, we typically recommend a backbone of evergreen shrubs for year-round structure, accented with flowering perennials for seasonal color.
- Inkberry Holly: A compact, native evergreen that grows 3 to 5 feet tall and tolerates our clay soil and partial shade. Cleaner appearance than boxwood and less prone to winter burn.
- Dwarf Nandina (Harbour Dwarf): Stays under 3 feet, provides red-tinged foliage in fall and winter, and handles full sun to part shade. Works well under windows where taller shrubs would block light.
- Knockout Roses: Disease-resistant, repeat-blooming, and low-maintenance. They provide continuous color from May through the first hard frost and require only basic annual pruning.
Border and Accent Beds
These beds along property edges, walkways, or fences offer more design flexibility. Layer plants by height -- tall grasses or shrubs in the back, mid-height perennials in the middle, and low groundcovers at the front edge.
- Switchgrass (Panicum virgatum): A native grass that provides movement, texture, and fall color. Grows 3 to 5 feet and is drought-tolerant once established. Stands through winter, offering visual interest when everything else has gone dormant.
- Black-eyed Susan: Maryland's state flower blooms bright yellow from June through October. Naturalizes easily, attracts pollinators, and handles the heat and humidity of our summers without flinching.
- Liriope (Lilyturf): An evergreen groundcover that ties the front edge of a bed together with a clean, uniform line. Purple flower spikes in late summer. Thrives in sun or shade and tolerates drought.
Shade Gardens
Properties in the wooded neighborhoods of Crownsville and parts of Severna Park often have significant shade from mature oaks, tulip poplars, and maples. These conditions require a different plant palette entirely.
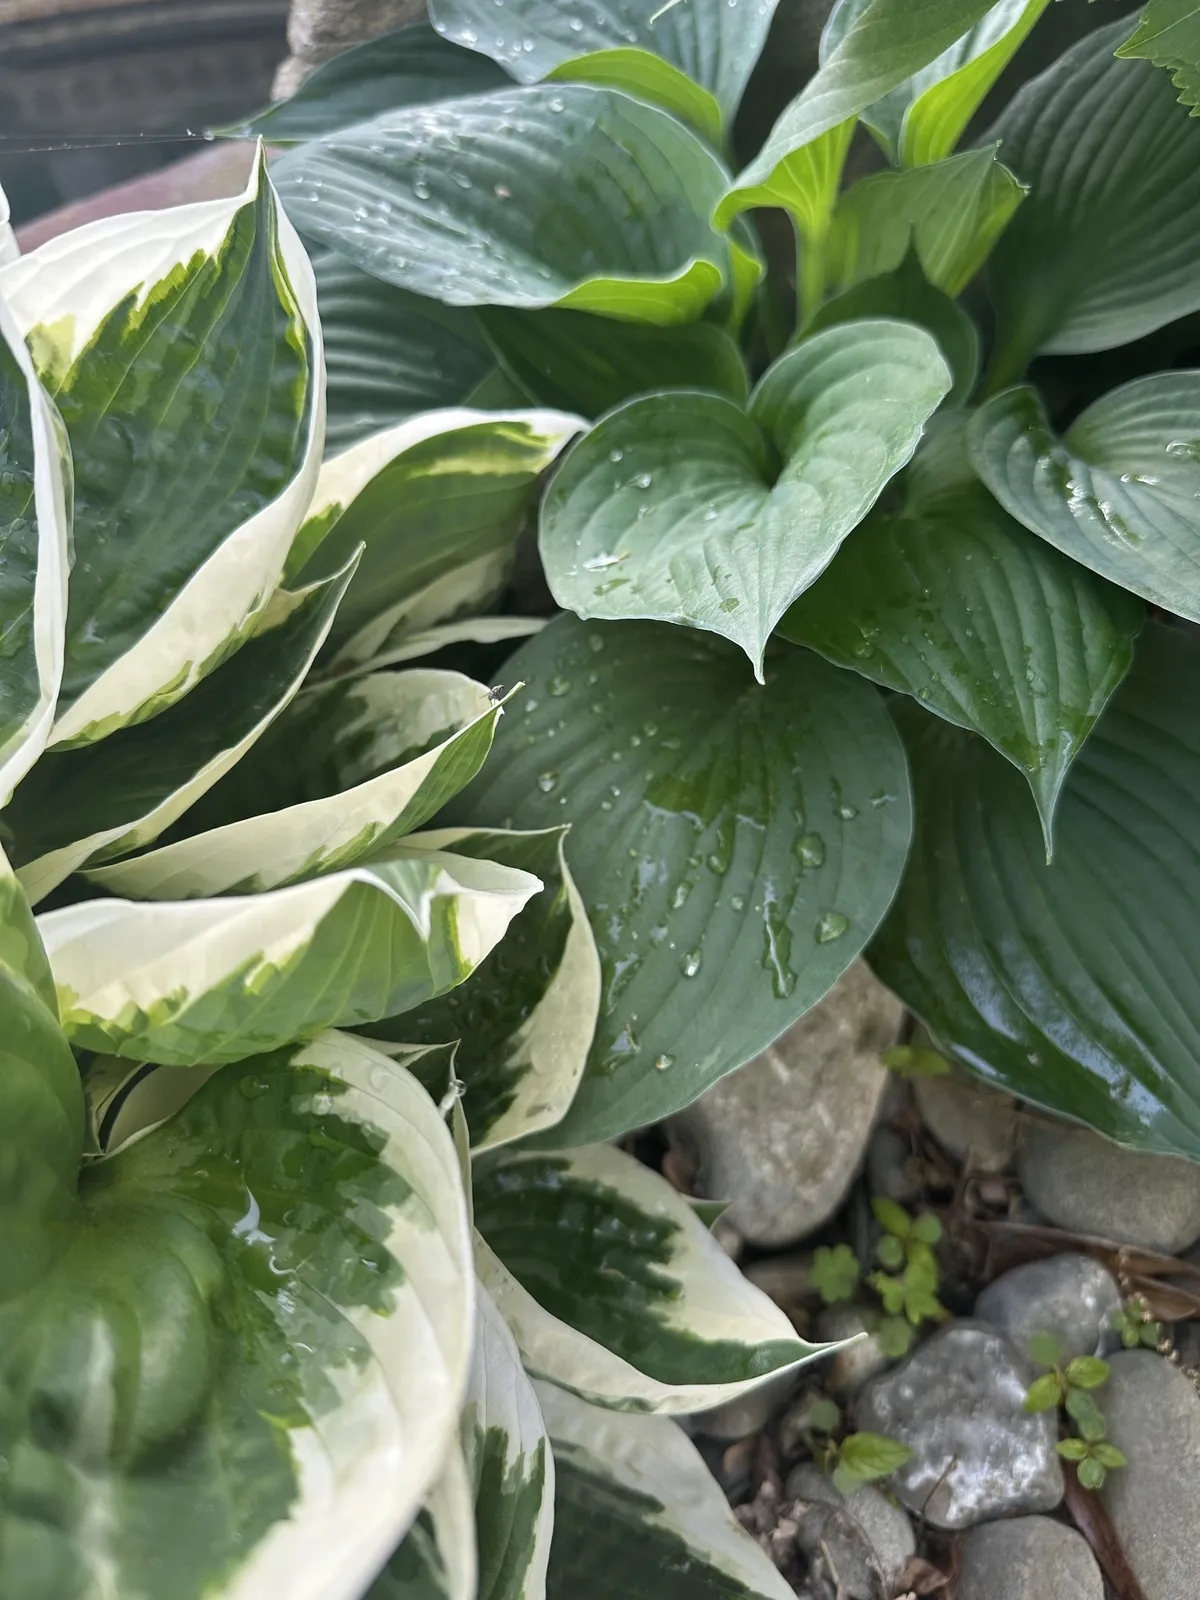
- Hostas: Available in hundreds of varieties from miniatures to plants with leaves two feet across. They fill shade beds with bold foliage texture and require almost no care once established.
- Heuchera (Coral Bells): Colorful foliage in shades of burgundy, lime green, silver, and peach. Delicate flower spikes in late spring. Evergreen in our mild zone 7a winters.
- Japanese Painted Fern: Silver and burgundy fronds that brighten dark corners. One of the most ornamental ferns available and fully hardy in Maryland.
For a deeper look at native plant options and Bay-friendly design principles, our landscape design ideas guide covers the full range of species that perform well in our climate.
The Installation Process Step by Step
Whether you hire a professional crew or tackle the project yourself, here is the process that produces the best results for garden bed installation in the Annapolis area.
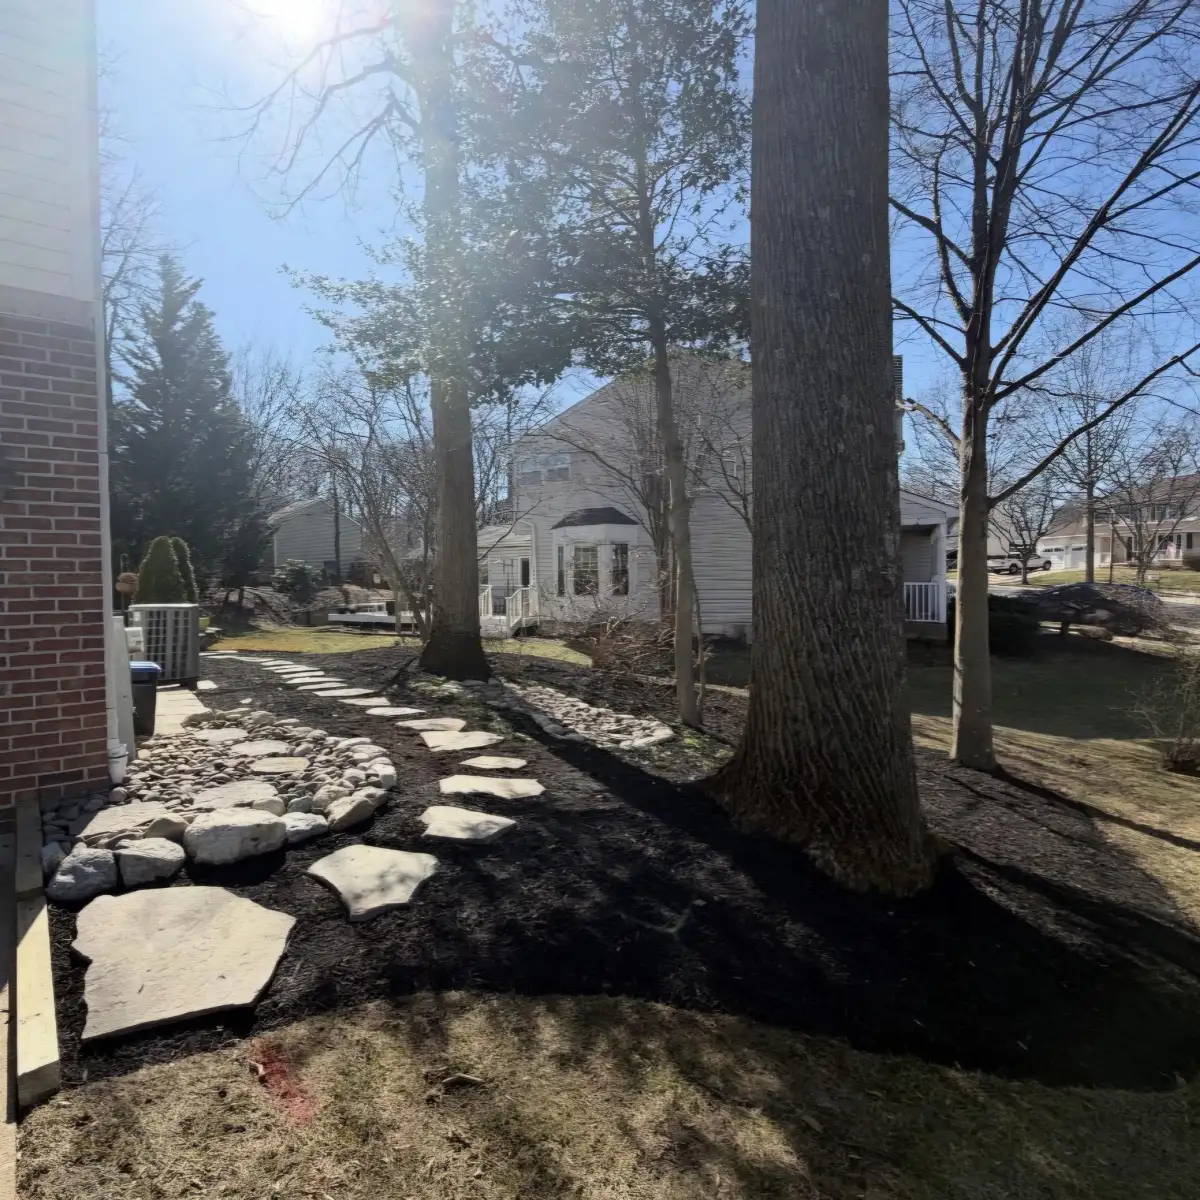
Step 1: Outline the Bed Shape
Use a garden hose or spray paint to lay out the bed's shape on the ground. Curved, organic shapes typically look more natural than rigid geometric lines, especially alongside lawns and walkways. Stand back and view the outline from multiple angles -- from the street, from the front door, from inside through a window. Adjust until the proportions feel right.
Step 2: Remove the Existing Turf
Cut out the sod using a flat shovel or sod cutter, going about two inches below the soil surface to remove grass roots. Do not just rototill the grass under -- it will regrow through your new plantings and become a permanent weeding headache. Removed sod can be composted or used to patch bare spots in other parts of your lawn.
Step 3: Amend and Prepare the Soil
Spread two to three inches of compost over the exposed soil and till it into the top 10 to 12 inches. Rake the surface smooth, check the grade for proper drainage away from structures, and water lightly to settle the amended soil.
Step 4: Place Plants Before Digging
Set all your potted plants on top of the prepared soil in their intended positions before digging a single hole. This lets you visualize spacing, height layering, and color distribution while adjustments are still easy. Step back and evaluate the arrangement. Move things around until every plant has adequate room to reach its mature size.
Step 5: Plant at the Correct Depth
Dig each hole twice as wide as the root ball but no deeper than the container. The top of the root ball should sit level with or slightly above the surrounding soil surface. Planting too deep is the number one cause of transplant failure -- buried root crowns rot in our clay soil, especially during wet Maryland springs.
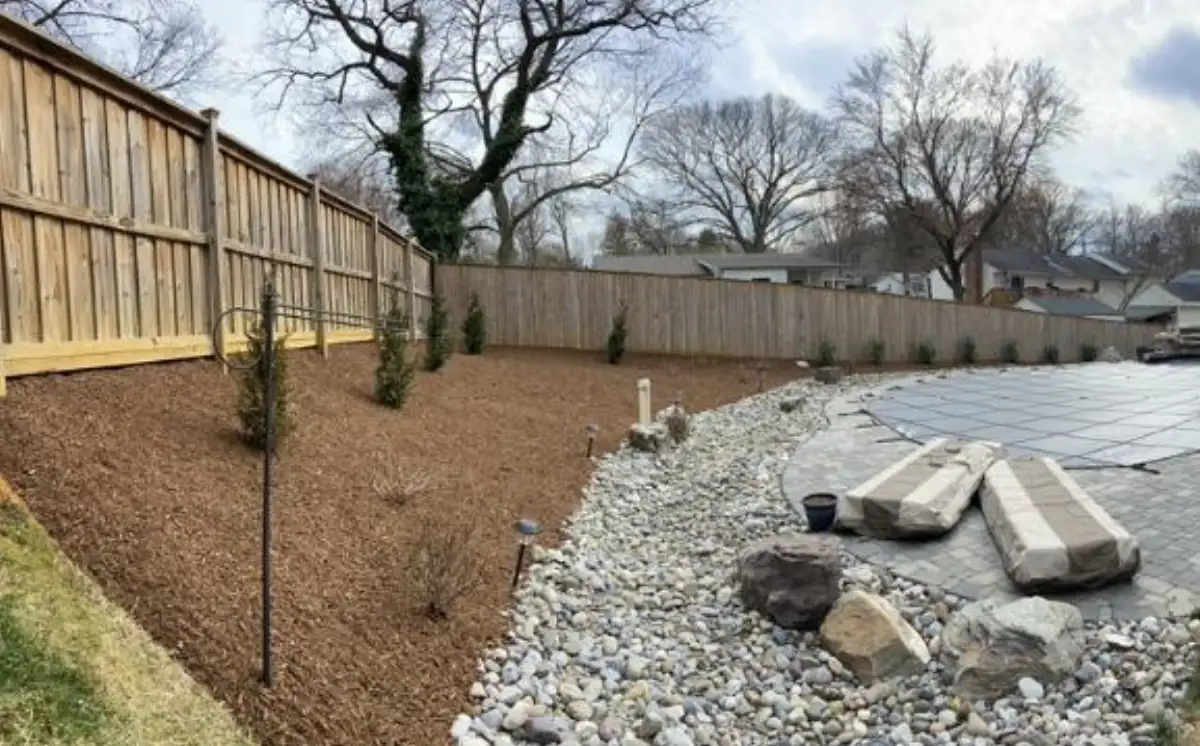
Step 6: Mulch and Edge
Apply two to three inches of quality mulch across the entire bed, keeping it pulled back two inches from the base of each plant stem. Mulch piled against trunks and stems causes moisture buildup and bark rot. Define the bed edges with a clean-cut trench or steel edging to create a crisp border between the bed and the lawn.
Step 7: Water Deeply
Soak the entire bed thoroughly after planting. For the first two weeks, water every two to three days unless rain provides at least an inch of moisture. After the first month, reduce to once a week. Most established perennials and shrubs in our climate need supplemental watering only during extended dry stretches in July and August.
Maintaining Your New Garden Bed
A properly installed garden bed requires surprisingly little ongoing maintenance. Here is the annual care schedule we recommend for Anne Arundel County properties.
- March - April: Cut back dead perennial foliage and ornamental grasses. Edge the bed borders. Apply a light layer of compost as a top dressing if needed. This typically happens during your spring cleanup.
- May: Refresh mulch to maintain a 2-to-3-inch depth. Plant annuals for summer color. Apply slow-release fertilizer to heavy feeders like roses and hydrangeas.
- June - August: Deadhead spent blooms to encourage repeat flowering. Pull weeds before they go to seed. Water during dry stretches -- deep and infrequent is better than light and daily.
- September - October: Divide overcrowded perennials and transplant them to fill gaps or share with neighbors. This is also ideal timing for aerating and overseeding the lawn areas surrounding your beds.
- November - December: Remove fallen leaves from beds to prevent matting and fungal issues. Cut back perennials after the first hard frost, but leave ornamental grasses standing -- they provide winter texture and bird habitat through February.
The biggest maintenance mistake we see is neglecting the mulch. Bare soil between plants invites weeds, loses moisture fast, and bakes in Maryland's summer heat. A fresh mulch layer every spring is the single easiest thing you can do to keep a garden bed looking sharp with minimal effort.
How Much Does Garden Bed Installation Cost in Annapolis?
Garden bed installation costs vary based on size, plant selection, soil conditions, and whether existing turf or old plantings need to be removed first. For Anne Arundel County, here are general ranges based on our experience.
- Small foundation bed (50 to 100 sq ft): $500 to $1,200, including plants, soil amendments, mulch, and labor
- Medium border bed (100 to 250 sq ft): $1,200 to $3,000
- Large landscape bed (250+ sq ft): $3,000 and up, depending on plant density and species selected
These ranges include plant material, soil preparation, mulch, edging, and professional installation. Premium specimens like large Japanese maples, mature ornamental trees, or specialty cultivars can increase costs significantly. We provide detailed, itemized quotes through our Jobber system so you know exactly what you are paying for before any work begins.
Let Schofield Outdoors Handle Your Garden Bed Project
Whether you need a simple foundation refresh or a complete garden bed installation designed from scratch, the Schofield Outdoors team has the experience and local knowledge to get it right. Every landscape design project includes a free on-site consultation and a complimentary 3D rendering so you can see your new beds before we plant a single shrub.
We have been installing and maintaining garden beds across Annapolis, Severna Park, Arnold, Cape St. Claire, Millersville, Pasadena, and Crownsville since 2005. Kevin personally oversees every project and stands behind the quality of our work.
Call us at (410) 656-3182 or request your free quote online. We typically respond within 24 hours.